All students will receive an account for this course on aurora, our teaching server. This includes a real web server: files posted to it will be visible to the world. Your course account will have a username, 105a-xx (where the xx stands for some combination of two letters, as specified on the account information sheet distributed to you in class). In the instructions below, whenever you see 105a-xx you should substitute your actual account id.
We will primarily use the accounts only for hosting of web pages. Although you may work on the aurora machines using a text editor such as pico or emacs if you already know how, the help materials in this course will assume that you are working with Dreamweaver on a local copy of your page, and uploading the results to the aurora server when finished. This document is designed to explain how to do so.
Contents
Connecting via SSH
Aurora is not a single entity, but a network of individual machines that share files. We will connect to one of the two computer science machines that are part of aurora. We will use a machine called aurora. To connect, you will need to use a secure communications tool called SSH, which is installed on all the Smith lab computers. (You can also download a copy for your own computer. If you are using a Mac, try Fugu instead.)
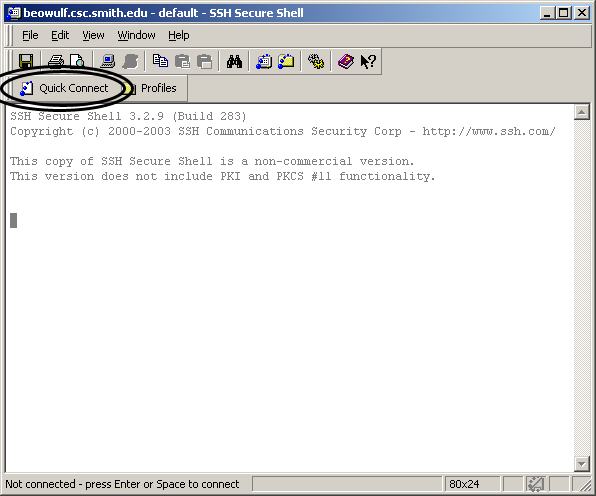
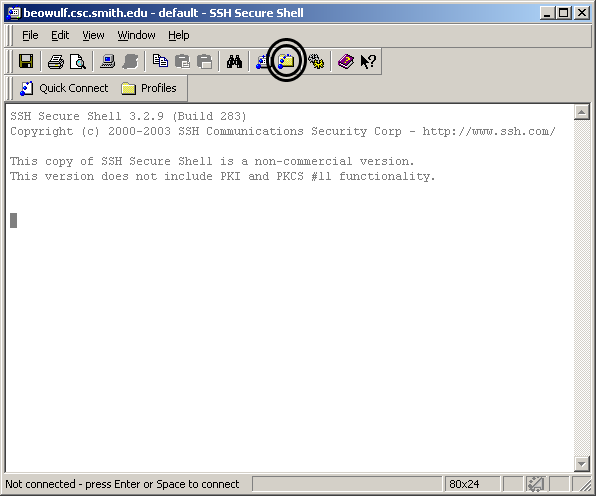
To connect, start up SSH. You should see a window like the one below; click on the Quick Connect button (circled).
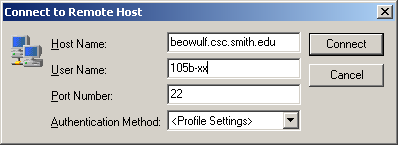
A new window should pop up with space to enter the host name and your account id (shown). Don't forget to replace xx with the right letters for your account!
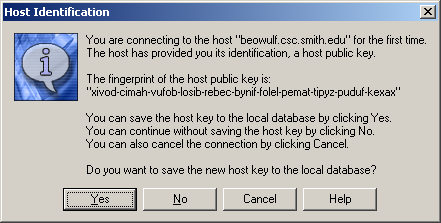
If this computer has not connected with aurora before, you may get a window like this. If you do, click Yes to continue.
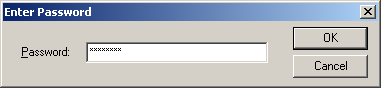
Eventually, a window will ask for your password, which was provided to you on the account information sheet. Enter it (it will show up as asterisks).
If all goes well, you should be connected to aurora and ready to proceed to the next step. (If something goes wrong, try again once or twice. Temporary outages can happen.) If this is your first time connecting, proceed to the next section, Setting Up Your Account. If you just need to post the latest page changes to the server, refer to the section on Transferring Files.
Setting Up Your Account
The aurora web server will display any files and folders placed within the public_html folder of your account. The URL of this main folder is http://www.cs.smith.edu/~105a-xx (substituting for xx as appropriate for your account). To help keep your files organized, and to simplify grading, you should create a standard set of subfolders inside public_html. Specifically, you will create a folder for each of your projects, named Project_1 andProject_2. (Please use the capitalization and underscore as shown, i.e., Project 1 is not correct.) You should also create one or more folders for your lab work. Finally you should create and maintain an index.html file with links to each of the projects and labs. These are the only things that should be stored directly within public_html. All other files should be stored within one of the subfolders.
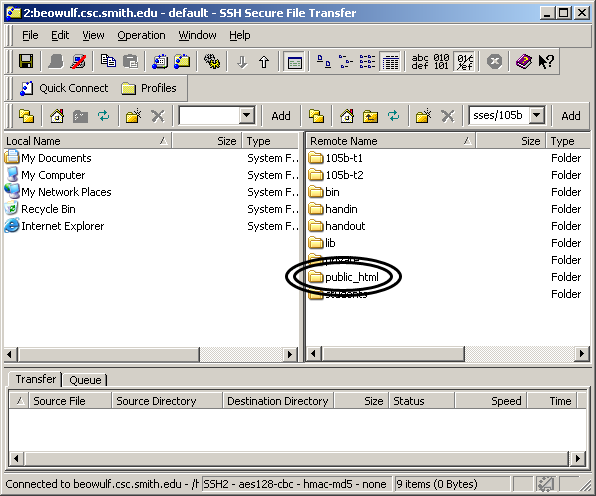
You can easily create folders once you have opened a file transfer window, as described in the next section. Toolbars above both panes allow you to perform various commands, including creating a new folder. The new folder icon is circled in the image below.
Once you have created the new folder, you can modify its permission settings in the SSH file transfer window by right-clicking on it and choosing Properties. Make sure it is executable and readable by everyone, and writeable by the owner (permission mask = 755). Ordinary files (as opposed to folders) should not be executable (permission mask = 644). If the permissions are set wrong on a file, or on one of the folders it is within, then you may not be able to view the file in a web browser.
Transferring Files
NOTE: The instructions here are out of date and have been replaced by newer ones.
To open up a file transfer window, first connect to aurora as described in the section on Connecting via SSH. You will see in the toolbar an icon that looks like a folder with blue bubbles (shown below). Click on it to bring up the file transfer window.
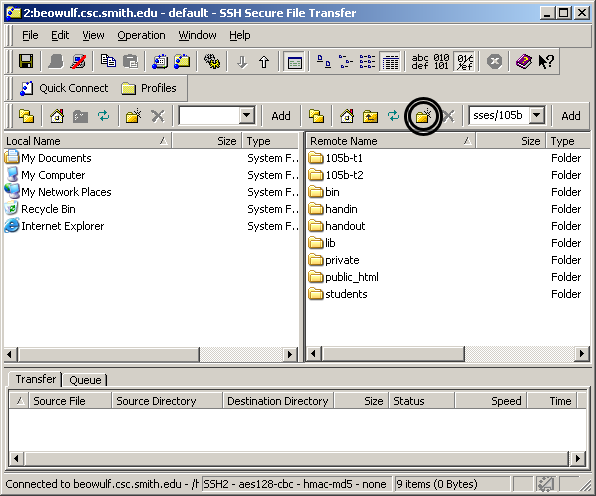
The file transfer window is split vertically along the center. The left-hand side shows files on your local machine. The right-hand side shows files in your account on aurora. All your web files should go somewhere within the public_html folder (circled below), otherwise they will not be visible to the web server.
In the left-hand pane, find the files on your local machine that you wish to transfer. In the right-hand pane, find and open the folder where you wish the files to be placed. Now you can simply drag one or more files from left to right. You can also make other changes on either side: renaming and deleting files, for example. If you accidentally put a file in the wrong place, you put a new copy in the proper place and delete the old copy. (See the section above on setting up your account for the set of folders you should create when you first start using the account.) Try to keep your files clearly named and neatly organized; it will help you to avoid confusion about which file is which. In particular, it is usually a bad idea to keep older versions of a file around, unless they are in a folder specifically labeled as an outdated or backup copy.