
Co-Researchers: Nell O'Rourke and Faith Weller.
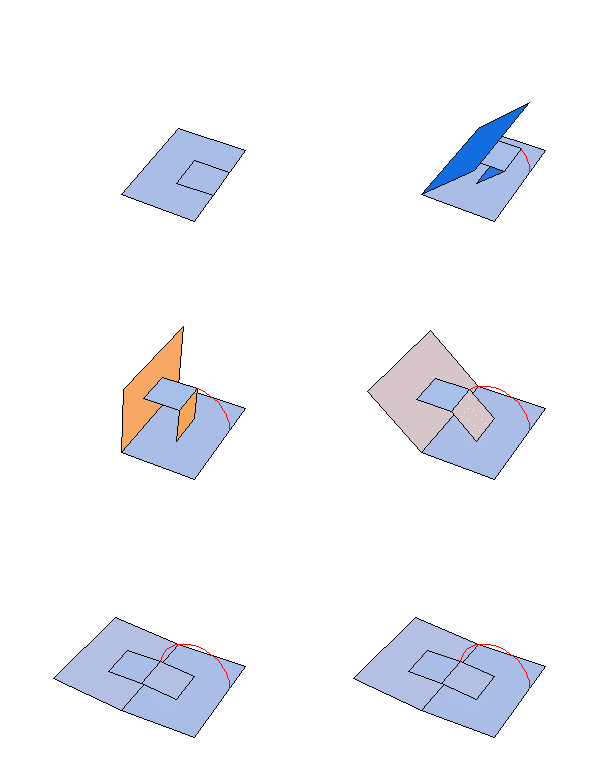
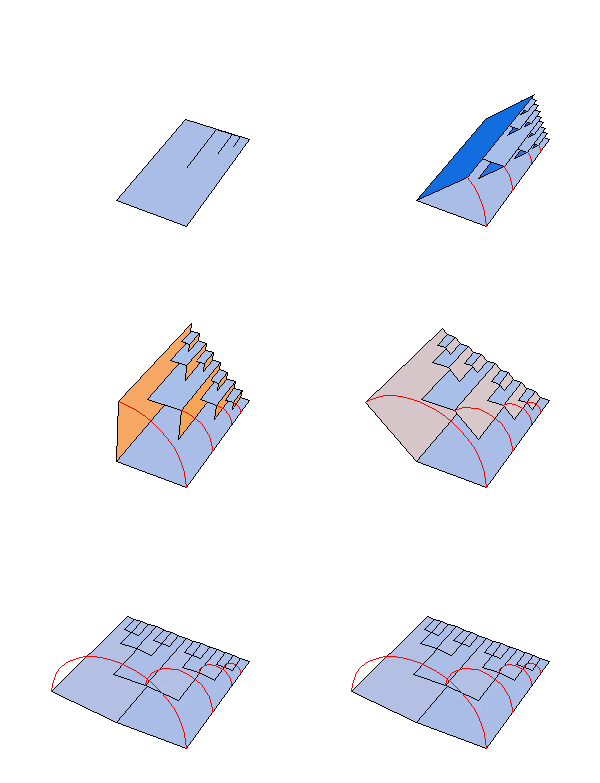
Nell, Faith and I work on the Pop-Up Book Project. The goal is to make a manual for teachers to use pop-up books as a tool to teach mathematics. We started by making different pop-up cards with simple parallel folds, folds via gluing and via cutting. We came up with some constraints that will always make a pop-up card work. For example,
After we made 3D animations of 3 of the pop-up cards we made, we investigated how to convert the Mathematica animation into an animated GIF. For more information on how to do this go to Nell's Page, where you will find a detailed explanation and the Mathamatica code used.
This is how a 3D animated GIF looked like after we exported it from Mathematica:
 |
 |
 |
Joe "waxing" the hand |
The hand drying out |
This week we worked on pop-up letters, card templates, Abode Illustrator images, and JPEGs for the book. We used Mathamatica to make animations of the pop-up cards and then saved some of the images to show statically the way the card opens. The images we saved as .EPS files so that we can work with Adobe Illustrator. With the Illustrator the pictures come out very nicely and clearly so it is easier to include them in the pop-up book guide. Illustrator we also used to make actual templates of the pop-up cards. The one below we did with the Illustrator.
Figure 1 |
This is the letter T. This letter was easy to make because it can be cut from a rectangular pop-up card. Here is how the picture looks like after we worked on it with the Illustrator (Figure 1).
We also had to take some pictures of actual pop-up cards. We took pictures of the Knight's Visor and the nice artistic cards that Gail made. We used Adobe Photoshop to crop them, adjust the colors, the contrast, the shadows,etc. These pics we saved as JPEG files (Picture 1, 2 and 3).
 Knight's Visor |
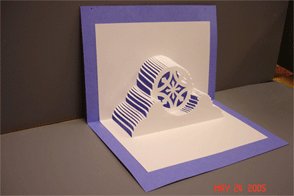 Gail's Card 1 |
 Gail's Card 2 |
The section of Parallel Folds is complete. Next to come is Rotary Motion.
On Monday we started working on Rotation. We wanted to make an animation of a card that when folding produces a cone. We did the animation on Monday but on the next day we realized that it is wrong. :( What was wrong was that the cone produced should have been rotated at 45 degrees while we had our cone at 90 degrees. Also the two polygons A and B within the card would not flatten when the card opens at 180 degrees. It was a very beautiful animation but alas it had to be corrected. This turned out to be a difficult task because we didn't know the angle that polygon B has with the base of the card. That is why Joe helped us with Mathematica and we had all the circles that trace the cone but we still didn't have the right coordinates for polygon A and B. Rotation turned out to be much more difficult than we expected. Figure 1 shows how the animation looks like after it was done correctly.
Next we had to make another card that is similar to the one above but with the V-fold displaced (Figure 2). That was supposed to be pretty straight forward but did actually turn to be tricky. We finished the displaced V-fold on Monday of Week 4. On Friday this week we had a brief tutorial on POV-ray and all the amazing things that it can do. Our goal for next week is to make a POV-ray image of sphere-cone intersection.
Figure 1: V-fold |
Figure 2: Displaced V-fold |
This week we started working with POV-ray. It turned out to be a lot of fun. POV-ray is a program that allows you to make images and pictures that resemble real life pictures but are not necessarily real. One needs just some imagination and patience to work on POV-ray and the results can be pretty amazing. Click here to check out POV-ray's website and all the cool images they have there. If you browse throught the web page you will also be able to find very nice pictures and animations. For more click here. POV-ray is a public code and free to download so you may find a lot of additional info if you also google it.
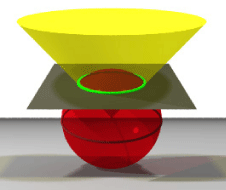 |
Our goal was to make a picture of a sphere-cone intersection and show that the intersection is a circle that lies on a plane that is orthogonal to the height of the cone (the line connecting the tip of the cone with the center of the base). The tip of the cone is at the origin (0,0,0), where is also the center of the sphere. The point was that for the two fugures above the crease of the V-fold not only produces a cone but also a sphere if we let it rotate in all directions.
Another point that was made was that if we construct a plane that bisects the angle of the card at any moment then the rib of the V-fold traces another circle that lies on the bisecting plane. Therefore the rib intesects the cone in a circle that lies on the bisecting plane. That was a very interesting point but it is kind of hard to picture this circle.
On the picture above we made the sphere transparent so that we could see better that the intersection of the cone and the sphere is the circle in orange. We tried to draw a circle in POV-ray but we couldn't because in POV-ray you can only make solid objects. That is why we used the code for a cylinder but we made the cylinder with height .0001. Also, we had to experiment quite a while until we get the camera and the lights the way we wanted them. We used radiosity that made the picture clearer and brighter.
#declare RAD = on;
global_settings {
#if(RAD)
radiosity {
pretrace_start 0.08
pretrace_end 0.04
count 35
nearest_count 5
error_bound 1.8
recursion_limit 3
low_error_factor 0.5
gray_threshold 0.0
minimum_reuse 0.015
brightness 1
adc_bailout 0.01/2
}//radiosity
#end //if
}//global settings
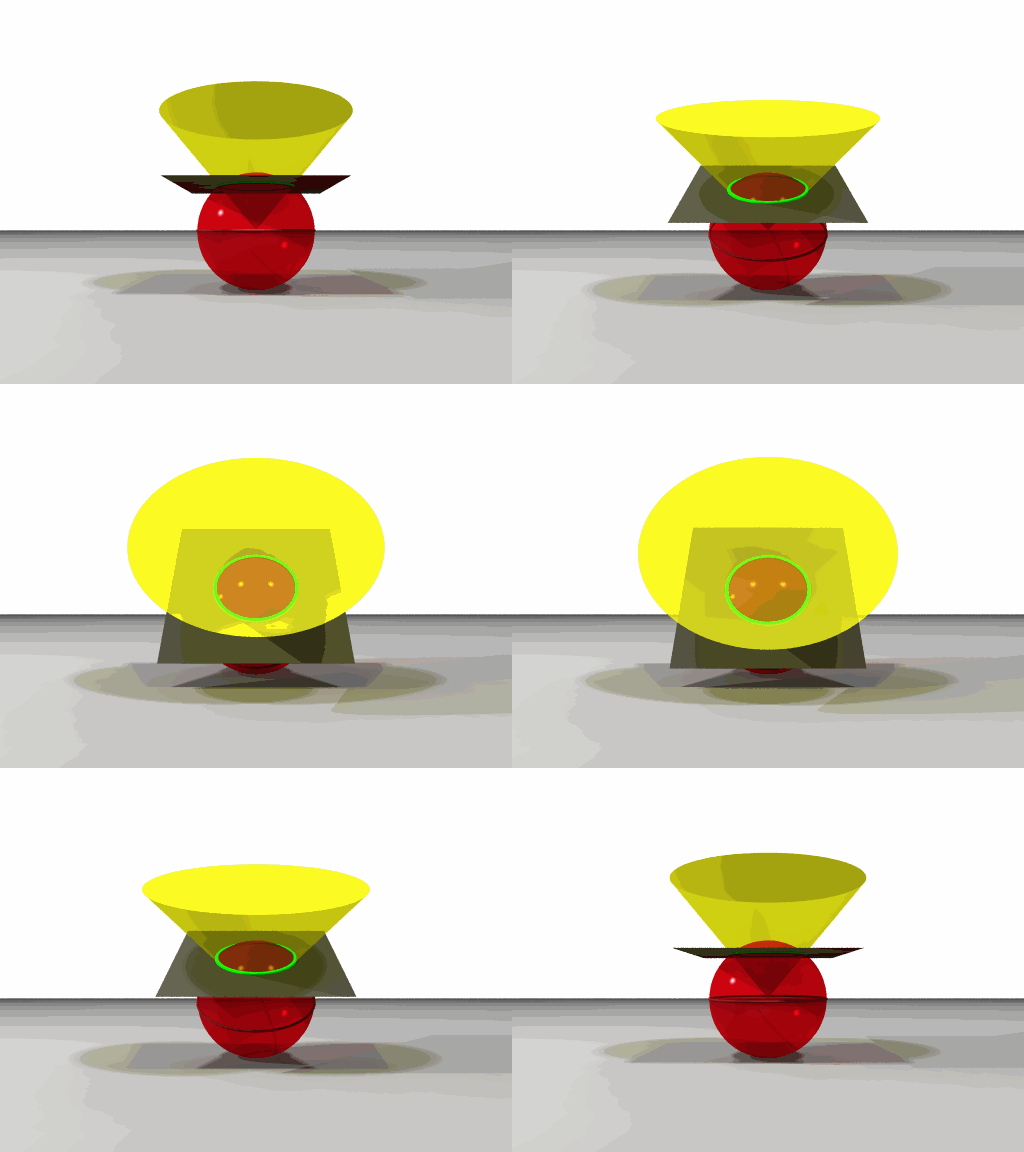 |
We thought that the picture above is not good enough because the purple plane above looks tangent to the sphere while in fact it is going through it. That is why we made the cone wider to make this point more clear and we also made a green torus to emphasize the intersection of the sphere and the cone. After that we made an animation. To make an animated gif we took 100 still images of the picture and inserted them in a software that we downloaded online-- Gif Movie Gear. It has a 30-day free trial. |
This week we started finding out that our animated gifs from Week 3 are wrong :( When the card is completely flat it should not look like there is a triangle pasted, rather it should look like a single cut because this is the way the V-fold is created. So we had to correct our Mathematica code. What was wrong was that one of our coordinates (ptip) was not correctly computed. After making all necessary corrections here is what the animations look like:
Figure 1: V-fold |
Figure 2: Displaced V-fold |
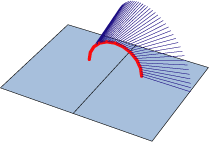 |
The pop-up card with the cone and the sphere turned out to be more complicated and intriguing than we originally thought. Our first guess was that the line that connected the side tip of the V-fold and the tip that lies right above it on the pasted rectangle traced the surface of a cone. We assumed that because the side tip of the V-fold was going on a circle and we know that because of the single cut and the folding of the card. The other tip we thought also goes on a circle. But then we noticed that the two assumed circles don't lie in parallel planes but still the distance between them is the same- that is the side of the pasted rectangle. So we ploted the surface in Mathematica and it found out that there is no apparent regularity of the surface. When we looked from above it seemed like the second tip traces a curve that is lying in a plane orthogonal to the base of the card but then we constructed the plane and it turned out it did not. Basically we couldn't find any regularity. We still don't know whether the second tip traces a circle or not. We are just sure that the side tip of the V-fold does. We know that the surface is not a cone for sure. Here is a picture of the mystery surface. |
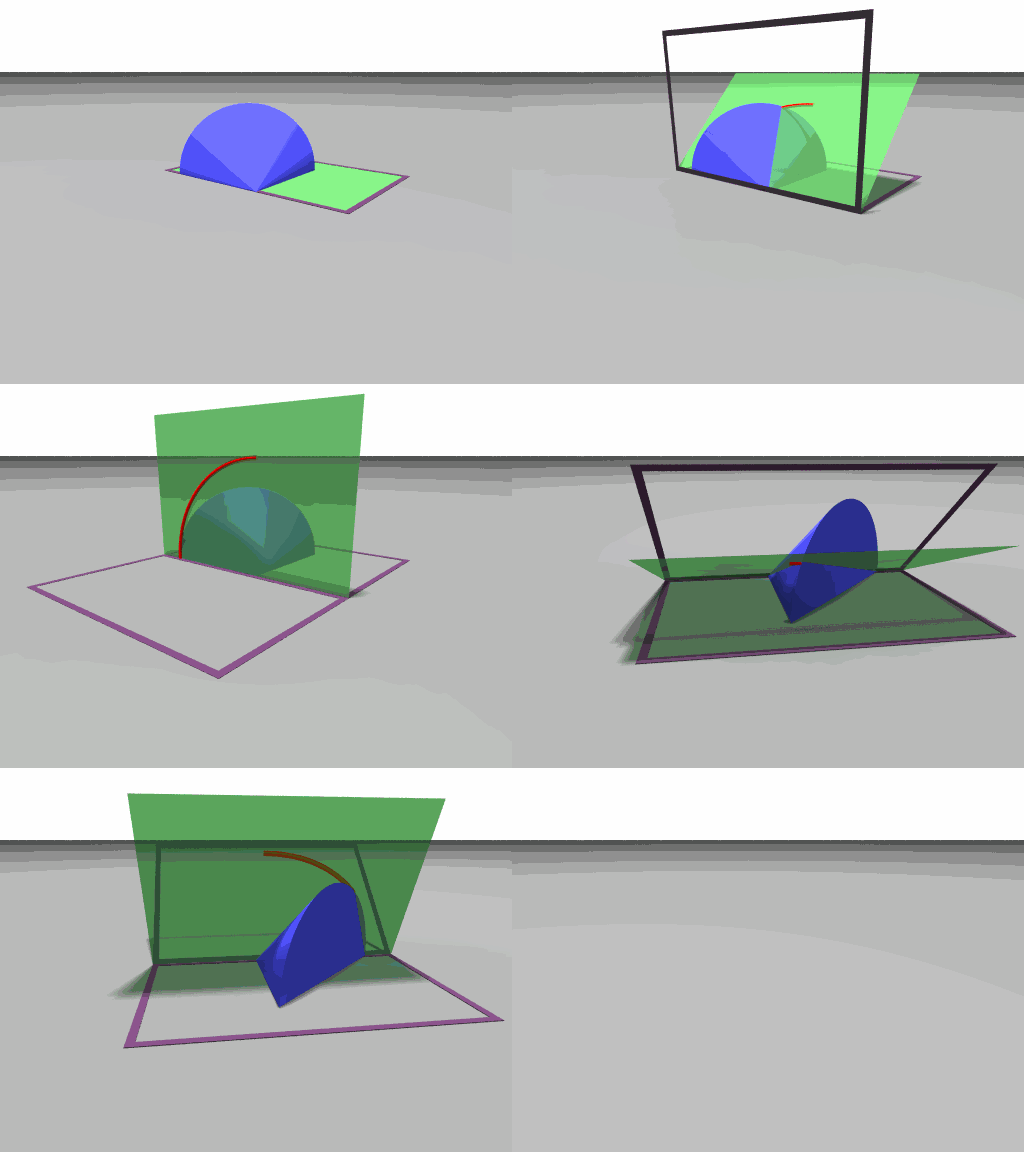
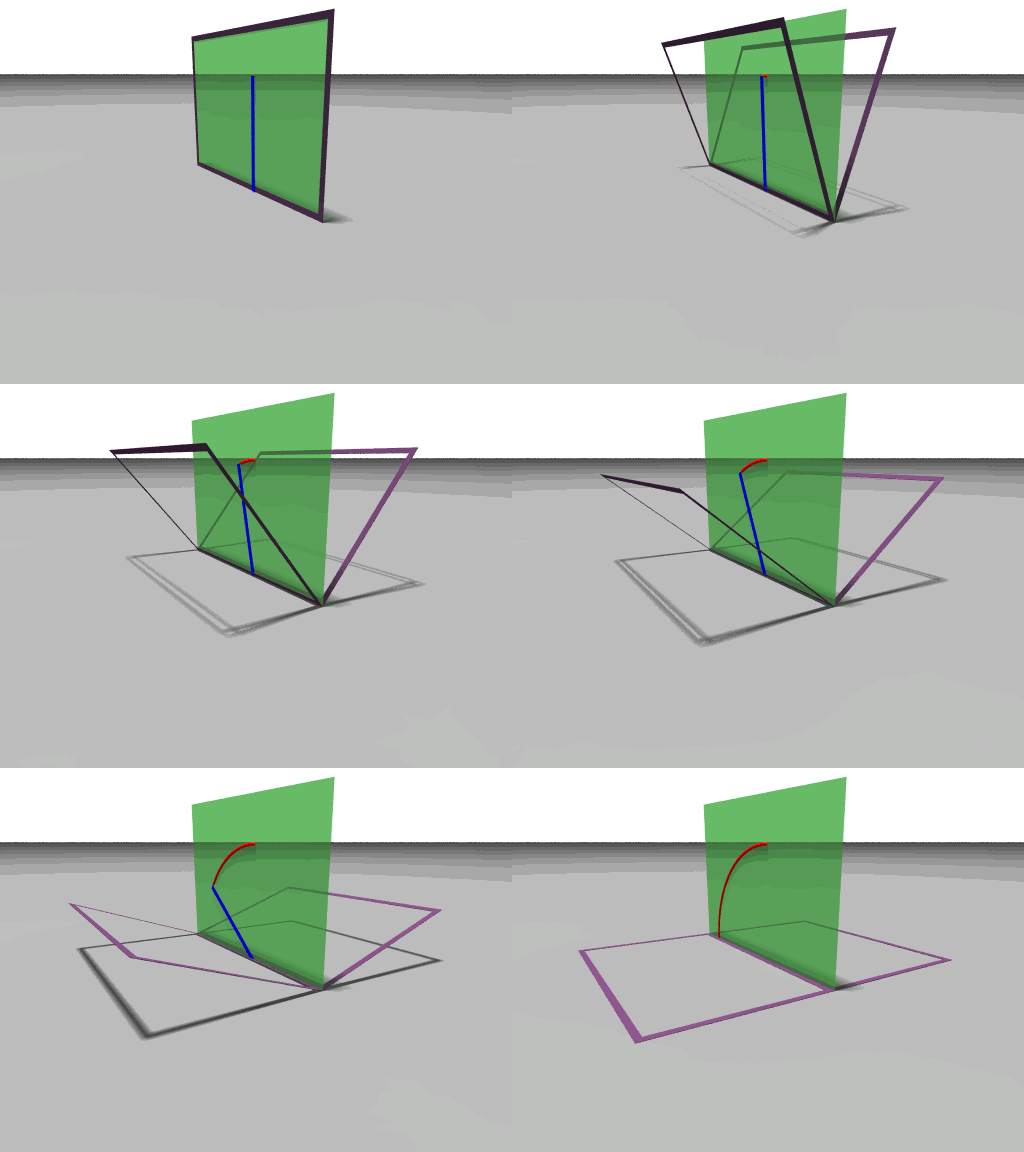
This week we went downtown shopping for paper because we had to make pop-up cards for the book. Nell and Faith made the platform card and we took pictures of all 3 cards that we needed. We also finished up the two animations of the medial plane. The first one was the one that we had trouble with. The rate at which the quarter circle is drawn is not constant troughout. So we had to calculate in Mathematica the function that is needed to correctly compute that rate. After we had this figired out it was easier to finish up the POV-ray animation. On the first animation below we have two different points of view of the same card. To make it easier for the viewer we have just outlined the edges of the card base and card front. On the second animation we have the medial plane being still and the card base moving from 90 degrees to 0 and the card front from 90 degrees to 180. The blue vector is showing how the quarter circle is drawn.
 |
 |
This week we moved forward with Rotary Motion. What we did before was a rotary animation of a V-fold in a valley crease and now we started the rotary animation of a V-fold in mountain crease of parallel folds. The whole idea is that when we place the V-fold in a mountain crease then the cone that we used to have with the V-fold in a valley crease is now "suppressed" so it is forced to stay flat by the plane of the base of the card. Thus instead of moving on a cone, the V-fold stays flat and rotates.
 |
We used a model of a card from last year to explore further how exactly rotation works. The card design is a V-fold in a mountain crease and a disk attached to the V-fold. When the card opens, the disk rotates, touching the base of the card. It took us quite a while to figure out the Mathematica code for this card. We used the code we had for the shifted V-fold but had to make some changes of the location of ptip. The way we computed it was we solved simulataneously few equations so that the distance between ptip and the other 3 vertices is the same. On a separate file we rotated and animated the disk. When we put everything together, things were working pretty well but we had trouble with our dimentions. It was kind of tricky to make all the dimentions work out the way we wanted them to work. Since we wanted our disk to stay within the base of the card and at the same time to be big enough to make the point more clear, we had to adjust all variables. The final version of the Mathematica file can be seen on the left. |
Also, when we looked deeper into the geometry of this card we wondered whether the angle of rotation follows any pattern or regularity. When we worked it out in Mathematica we saw that the function of this angle is not linear. In fact it looks like that:
 |
After Nell fitted the function in Mathematica, she found out that the approximation for this nonlinear function is -0.39123246825920405 - 0.007347310168861377t + 0.008424189247478479t^2- 0.00003113233599051286t^3. |
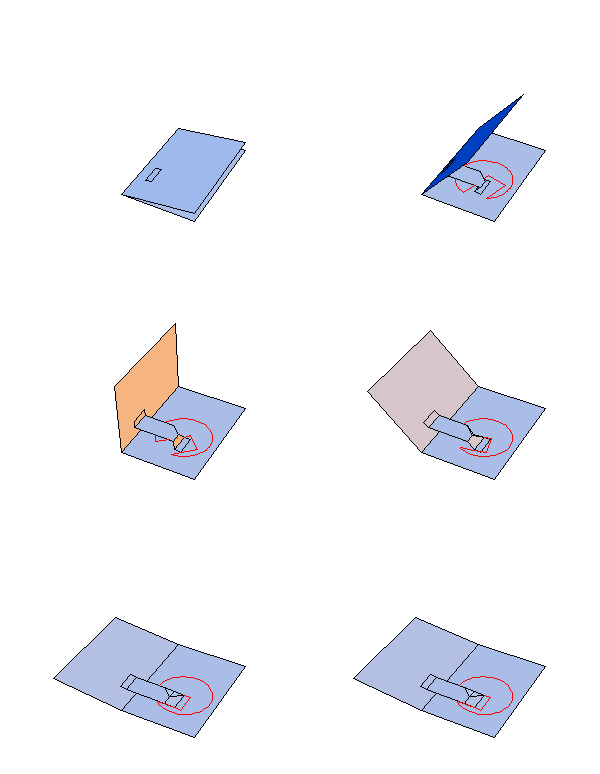
This is our final week of work. We had things to finish from last week on Rotation. We made the still images for the rotating circle from last week (Fig. below). Also we worked on some templates for the Rotary Motion section of the book: a template for the rotating disk and a template for the rotating wheel. Faith made some nice pop-up cards. The idea was to make a cow jumping over a moon, which turned out to be a complicated task. But below you can see how the card looks like and how some cards that students previously made look like. Nell finished up a POV-ray animation of Rotary Motion. You can check it out if you look under week 7 here.

Stills of Rotation Circle
Rotation 1: Cow jumping over a moon |
Rotation 2: Rotation Wheel on a Platform |
Rotation 3: Rotating Circle in a Mountain V-fold |
Before we leave we also had to organize all files (Mathematica, .eps, .gif, etc.) and clean up all the mess that we have made this summer :).
Friday noon is when we are officially done. We are planning on a pizza party after that. :)
To learn more about the other Summer Research Projects click here.