building the body - programming - components - our progress - resources - home
Sensors
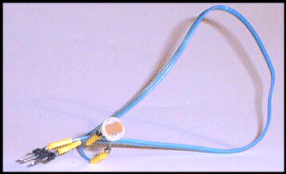 Light:
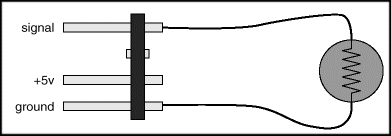
The light sensor is simple to wire and to use. Its is simple photocell that
converts an electrical charge to an analog value. Calibrating it can be tricky.
Its important to hold this sensor in a fixed position so you can get a true
reading on it. We drilled into a Lego block to make a mounting for it. Once
calibrates and held in place, about one inch from the path our bot was following,
the photocell gave us an accurate read and worked great. To calibrate, load
a sensor watcher program and place the bot on the path and move it slowly
to all areas. We searched for a value that was higher than every white value,
but lower then all of the black values. Due to poor lighting conditions and
shadows, this number was often nonexistent (15 would register white on one
side of the track and black on the other.)
If you can't control your lighting conditions, consider adding a small headlight to illuminate the area you are following to eliminate shadows.
 Touch:
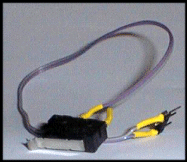
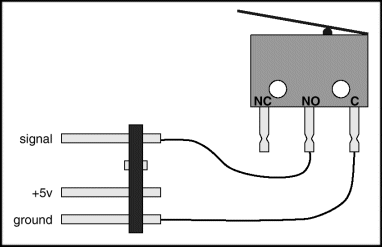
There is very little to say about this sensor. It works like the lego touch
sensor. It has two states: Open (not pushed) and closed (pushed). When you
close it, you close a circuit.
Pyro Electric:
The
pyroelectric sensor is a fussy little sensor. It is important to note that
while we originally planned on using one, we do not recommend them. First
of all, it is very important to have them wired correctly as they are very
sensitive. Be sure when wiring them to not touch the sensor itself, 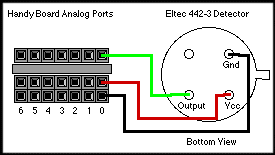 be
careful with the wires and prongs, and take your time. The same goes for the
cone that comes with the kit. It must be cut and glued precisely or it will
not fit the sensor. Be sure not to touch the fresnel lens or the lens of the
sensor itself. Wire it carefully according to the diagram.
The sensor was then tested with the generic sensor testing program. To be perfectly honest, we never witnessed our sensor working consistently. To test the sensor, it was set up within various distances of a candle in a dark room. Despite all we read about a spike (a huge jump in the output numbers, this was only seen a couple of times. The sensor would also completely change numbers if the tester's roommate happened to walk in.
The sensor works much better if during testing it is held by a set of long handled tweezers or some sort of device that can hold it away from your hands. The body heat I generated in holding the sensor would also make it behave strangely. It was still extremely difficult to calibrate, because drafts that changed the amount of candle flame also would make the numbers change drastically. Since IR sensors and even light sensors served others well at the competition, we decided that were we to continue we would use one of these options.
Acroname's "Eltec Pyroelectric Detector Package Interface to a Handy Board" (complete with sample source code and diagrams)
IR: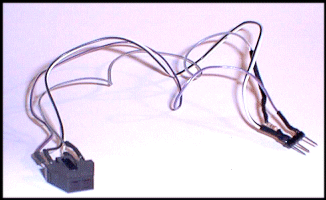 Most of the teams we saw at Abington used, and had success with, an IR sensor
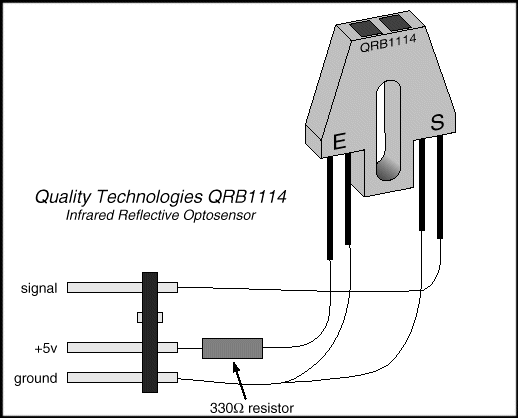
for flame detection. The sensor, shown here, is wired with a diode to reduce
the 5 volts of current to 3. (see diagram). Test it on an analog port with
a sensor watcher. They work better with a collector to focus the IR signal
and to filter out background noise. Take a black plastic 35mm film case and
mount the sensor in the back. Instant collector. (It is often necessary to
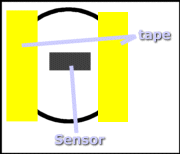
close the oculus of the container with tape to narrow the area. I put tape
on both sides like this:
Like the PE sensor, this works best if you don't hold it in your hands when you test it, unlike the PE sensor, this sensor DOES find a candle in a dark room, and more usefully in a lighted room,
Range: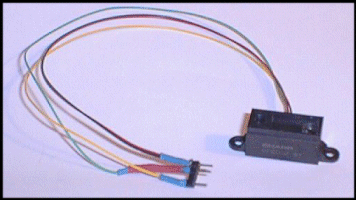 We
bought a Sharp GP2D02 IR range sensor from Acroname. I was having lots of
trouble explaining this sensor until I found this page. Its a
great GP2D02 guide. It details wiring the sensor(which I'm still not sure
if I did right), programming and using the sensor. This site even includes
a set of library functions for using this sensor. (Note: the range
sensor test code that I used does not use this library. I found this resource
ON the day this project was due so I haven't fully tested it, so this might
be a good point for the new team to start working once they have the basics.)The
problem with the sensor is that it works a bit too fast for the HB under standard
conditions. These library functions optimize and allow for more accuracy.
If you want to use these libraries, download them (I have them here: GP2D02_I.asm
& GP2D02_I.icb ) save them into your
/IC/Libs directory and add them to your lib_hb.lis. (See the servo
section for more details.) This will allow you to use the sensor with
simple function call. The site also has a library for running 4 range sensors
and another for running 6.
Acroname's Datasheet on Sharp GP2D02 Infrared Ranger includes test routines
Demystifying the Sharp IR Detectors explains several good positioning schemes